UncleCheese
9th January 2015
In this tutorial we’re going to focus on the Travel Guides section of our website for this topic. As we can see in the designs, there are two templates required for this section -- a list view, or “hub” page, and a detail page. This is one of the most common patterns in web content, used throughout the web; think of news listings, image galleries, even a Twitter timeline.. To accomplish this in SilverStripe, we’ll use a very common convention.
In this tutorial we’re going to focus on the Travel Guides section of our website for this topic. As we can see in the designs, there are two templates required for this section -- a list view, or “hub” page, and a detail page. This is one of the most common patterns in web content, used throughout the web; think of news listings, image galleries, even a Twitter timeline.. To accomplish this in SilverStripe, we’ll use a very common convention.
The idea is simple. One page type manages the list view, and usually contains very little native content. The primary function of this page is to provide a list of its child pages, providing a brief summary for each one, along with a link to its detail view. A second page type will represent the detail view for any given child page, which will typically have a custom template and content fields that make up its identity.
Creating the page types
By convention, not enforcement, the list view and the detail view are named with the suffixes Holder and Page, respectively, and the name of our content type takes the prefix. In this case, our Travel Guides section features a type of content that we’ll call “Article,” so our page types will be named ArticleHolder and ArticlePage.
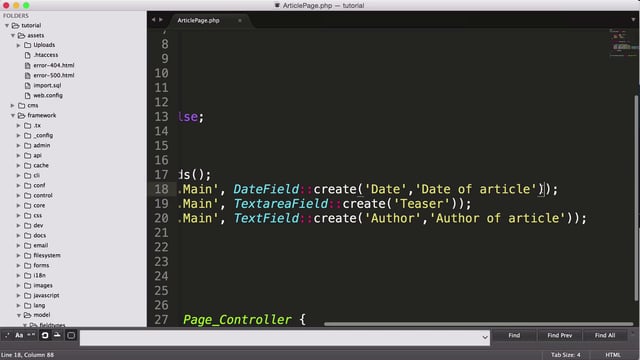
In the last episode, we created our first custom page type, HomePage. Let’s repeat that process, and create a page type called ArticleHolder. To recap, we need a PHP file called ArticleHolder.php in our mysite/code directory that contains a pair of empty classes, like so:
class ArticleHolder extends Page {

}

class ArticleHolder_Controller extends Page_Controller {

}
Likewise, we’ll do the same thing for ArticlePage.
class ArticlePage extends Page {

}

class ArticlePage_Controller extends Page_Controller {

}
We’ll also need templates for these pages. In your theme directory, copy the contents of static/article-holder.html to templates/Layout/ArticleHolder.ss, and static/article-page.html to templates/Layout/ArticlePage.ss.
Notice that our designer has made things easier for us by only including what belongs in our $Layout template. We still have to add our common variables, though. Before we go any further, let’s add $Title, $Content, and $Breadcrumbs to their appropriate places.
Also, while we’re at it, let’s tidy up a bit and move the breadcrumbs and title section (Marked <div class="parallax colored-bg pattern-bg">) to its own include template, which we’ll call Banner.ss. Don’t forget to update your templates/Layout/Page.ss file, as well.
Since we’ve created two new page types and two new templates, we’ll need to build the database and flush the template cache before proceeding. We can do this all at once by visiting /dev/build?flush in the browser. Make sure you see some blue text showing that SiteTree.ClassName was updated and the new page types displayed in green.
Let’s go into the CMS and add these new page types to the site tree. This is probably a good time to build out the primary navigation of our site. Delete all of the pages except “Home” and “About Us.” Then, build out the structure with the following Titles and page types:
- Home (HomePage)
- Find a Rental (Page)
- List Your Rental (Page)
- Regions (Page)
- Travel Guides (ArticleHolder)
- About Us (Page)
Note that in order to get the “About Us” page to the bottom, you will have to use drag-and-drop.
Now that we have our new ArticleHolder page in place, create some child pages underneath it. These should use the page type ArticlePage. Feel free to title them any way you like.
Let’s go back to our site, and visit the Travel Guides section. This looks good, but obviously, we don’t want static content here. We want these articles to reflect all of the child pages in this section.
To accomplish this, we’ll use a template method that is afforded to all pages in the SiteTree, called $Children. This method returns a list of all the pages whose parent is the current page. Because it returns a list, we’ll need a <% loop %> control.
    <% loop $Children %>
    <div class="item col-md-6">
      <div class="image">
        <a href="blog-detail.html">
          <span class="btn btn-default">Read More</span>
        </a>
        <img src="http://placehold.it/766x515" alt="" />
      </div> <div class="tag"><i class="fa fa-file-text"></i></div>
     <div class="info-blog">
       <ul class="top-info">
         <li><i class="fa fa-calendar"></i> July 30, 2014</li>
         <li><i class="fa fa-comments-o"></i> 2</li>
         <li><i class="fa fa-tags"></i> Properties, Prices, best deals</li>
       </ul>
      <h3><a href="blog-detail.html">How to get your dream property for the best price?>/a></h3>
      <p>Sed rutrum urna id tellus euismod gravida. Praesent placerat, mauris ac pellentesque fringilla, tortor libero condimen. Aliquam fermem tum nulla felis, sed molestie libero porttitor in.</p>
     </div>
    </div>
    <% end_loop %>
When we step into a loop, the scope of all of our variables is set to the current iteration of the loop. That is, accessing the $Title property inside the loop will not return the property of the current page, Travel Guides, but rather the titles of each child page.
Let’s go through the loop and replace any static content with variables that we know to exist on the child pages.
- Replace the title with $Title
- Replace the link to blog-detail.html with $Link
Everything else can be left static for now.
Note that any pages that have Show in menus unchecked will be hidden. To show all children, regardless of their Show in menus state, we can use $AllChildren.
There’s a lot left undone on this page that we’ll leave as static, especially in the sidebar, but we’ll be picking it apart over the course of several tutorials.
Refresh the page and see that we’re generating some dynamic content. Try clicking on a link and see that it takes you to a detail page for the article. The detail page is still hardcoded. Let’s fill in the $Title, and $Content variables where they belong.
Applying hierarchical constraints
Lest we forget, ultimately what we’re building is an experience for a content editor. It’s easy to forget this as a developer when you’re just focused on getting frontend functionality to work as it’s supposed to. One of the hallmarks of a great CMS developer is attention to the user experience in the CMS.
Let’s take a moment to assume the role of a content author, and imagine that we want to create a new article. Going through this process, we notice two glaring usability hazards:
- The user can add an ArticlePage anywhere in the site tree
- When adding a child page to Travel Guides, the user has to know to use the ArticlePage page type.
SilverStripe offers an API for hierarchical constraints that will enforce that pattern that we require. Let’s start by ensuring that only ArticlePage can be created underneath Travel Guides. Add the following to your ArticleHolder class:
private static $allowed_children = array ('ArticlePage');$allowed_children is just what it sounds like. It’s a list of the page types that are allowed to be created under this page type. Note that a scalar value is also accepted here if you have only one page type.
There’s a bit of an oddity we need to cover when modifying private static class variables. In SilverStripe, private statics are functionally the same as updates to the config YAML files, which is to say we could have just as easily applied our $allowed_children setting in our config file like so:
ArticleHolder:
  allowed_children:
    - ArticlePage
Whichever way you choose is a matter of preference. Historically, these types of common settings on pages have been set as static variables, as the config API wasn’t introduced until version 3.0, so for consistency, it makes sense to use a static variable in this case, but again, it is functionally identical.
Because of this overlap, just like in the config API, private static variable changes do not apply until we flush the cache. If it seems odd that you have to flush the cache after making a simple change to your class definition, that’s a good sign. You’re normal. This is an idiosyncrasy of the SilverStripe framework, and without getting into the specifics in this tutorial, suffice it to say it’s just one of those things you have to be aware of.
Let’s flush the cache, by appending ?flush to the URL, and go back into the CMS. Try adding an incorrect page type under Travel Guides. Notice that the dropdown is forcing the ArticlePage page type on us.
But what about pages at the root level? Because there is no page type for the root, we can’t specify $allowed_children. For this, we can use the boolean variable $can_be_root on our ArticlePage class, and flush the cache.
private static $can_be_root = false;Now if we try to create an ArticlePage at the root level of the site tree, the action is disallowed.
Now if we go through the process of creating a new ArticlePage, it feels much more forgiving and streamlined.