Overview of dependency management works in SilverStripe
If you refer back to our first lesson on installing SilverStripe in your development environment, you'll recall that we did this using Composer. Composer is a package manager for PHP, and it makes our lives a whole lot easier by providing version constraints, allowing for peer dependencies, and never allowing our project to exist in a state where two packages conflict with each other. The primary place you will find packages for Composer is on packagist.org, a directory where package authors submit links to their code repositories for others to install easily. Many packages are set up to auto-update from their repositories, ensuring that the directory is always up to date with the latest releases.
How Composer works in your project
There are two main ingredients to a project managed by Composer, and they both sit at the root of your project: composer.json and composer.lock. It is very easy to confuse these two files, or treat them similarly, but understanding the difference is critical.
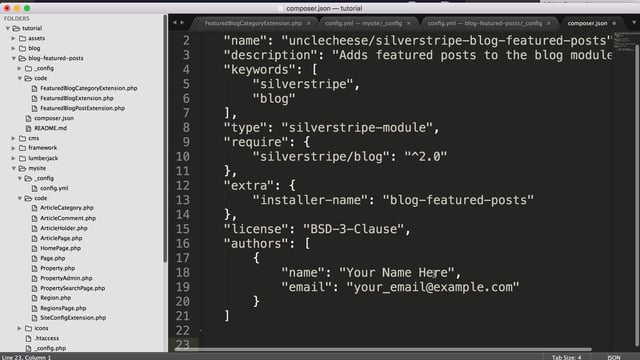
composer.json is the file that declares the packages required for your project to run, and the range of versions that are acceptable. This second piece is really important. Many composer.json files do not specify an exact release or commit. They provide boundaries, for instance, "no lower than 2.0, and no higher than 2.1". This allows for opt-in upgrades with a single command.
composer.lock is the file that specifies exactly what commits of each package the project is using. When your project is deployed, or when another user installs your project, this file is used to pull down the exact versions of the dependencies that are currently running on the project.
An easier way to think of the separation is that composer.json is used by composer update and composer.lock is used by composer install.
When you run composer update, Composer will check your composer.json and see if it can find any newer versions of each package that are allowed within the constraints you've provided. For example:
- You've specified "no lower than 2.0, and no higher than 2.1" for Package-A.
- Your
composer.lockfile says you're currently on 2.0.1 - Composer finds that a there is a 2.0.2 and a 2.0.3 release of this Package-A.
- Composer will install 2.0.3, and update your
composer.lockfile accordingly.
On the other hand, when you run composer install, Composer will simply read your composer.lock file and download the exact commits specified there. If a new version of Package-A is available, it won't know or care. It is therefore critical to:
- Always run
composer installand notcomposer updatewhen setting up or deploying a project. - Make sure
composer.lockis in source control. (Ideallycomposer.jsonas well) - Consider running
composer updatea breaking change, requiring a new commit (a changedcomposer.lockfile), ideally on separate branch, requiring testing before deployment.
Using Composer to upgrade SilverStripe
Let's have a look at the composer.json file in our project. We can see that we have minimal dependencies. We're currently running version 3.1.8 of SilverStripe. This is actually pretty far behind. In fact, a new minor release has come out since we started this project, so let's get up to speed on version 3.2. As of this writing, the latest release is 3.2.1.
One option would be to simply change both of these 3.1.8 constraints to 3.2.1. This could work, but it's playing it pretty safe. SilverStripe is using semantic versioning, which will help us make a decision on what exactly we should specify here.
The idea of semantic versioning is simple. Release names are broken up into three parts, separated by dots. When the number all the way on the right changes, it means the changes include only bug fixes or security patches. When the number in the middle changes, it means new features have been added in that release. When the number all the way on the left changes, it means there are API changes, and backward compatability is not guaranteed. You can learn more about semantic versioning at semver.org.
Therefore, we can safely assume that anything beginning with 3.2 will not break our project, so let's use a the ~ syntax to specify that.
"require": {
  "php": ">=5.3.2",
    "silverstripe/cms": "~3.2.0",
    "silverstripe/framework": "~3.2.0",
    "silverstripe-themes/simple": "*"
}
For more information on the version constraint syntax, visit the composer documentation.
Because we made changes to the composer.json file, we'll need to run composer update to get our new stuff. Let's do that now. (It takes a while! Be patient.)
We've upgraded our version of silverstripe, so it's important to run dev/build?flush at this point. We see that everything is still working well. There are no major API changes going from 3.1 to 3.2, so we can say with a high level of confidence that all of our code will work exactly the same way as before.
Using Composer to install a module
We'd like to put a blog on our website. Fortunately, there's already a great module authored and maintained by the SilverStripe core team that provides blogging functionality. Let's see if we can find it.
A simple search on Packagist, Github, or even just Google for "silverstripe blog" should turn up everything you need, but the recommended way to find and discover new modules is on addons.silverstripe.org. Here, you can see all the latest and popular modules along with instructions on how to install them.
Searching for "blog" on the addons site gives us a result for silverstripe/blog. Let's take a look at that. In the instructions, we get a one-line command we can use to install the module. Before we just copy and paste this into the terminal, however, we're going to make a slight change. This command declares the version as "dev-master", which isn't a great idea. We'll basically be locked on to whatever is on the master branch, which is often experimental and untested. A much safer bet here is to choose the latest release. If we don't specify a version, that's what we'll get.
composer require silverstripe/blogNotice how we don't get the exact version 2.3.0. The caret (^) before the version number tells composer to allow the latest stable release of version 2.x, so when 2.4 comes out, a composer update will fetch that.
The blog module has downloaded, and we'll need to run dev/build again. We should see a lot of green as all the new tables get built.
We'll want to make sure that this new directory does not get checked into our repository, so it's important to add it to our .gitignore file before we make any new commits.
.gitignore
...
...
blog/
Let's go into the CMS to create our first blog. Notice that the CMS UI has been slightly updated in version 3.2. There are many other important updates happening under the hood, as well. If we click on "Add new" we can create a new blog. We'll just create an example post to populate it.
Taking a look at it on the frontend, we can see it's a bit of a mess. That's because the module ships with its own set of templates, which don't necessarily get along with the templates we're already using. As we covered in earlier tutorials, we can simply override these templates by placing templates of the same name in our theme directory. In the static/ directory that comes with this lesson, you'll find two new templates. Just copy them into templates/Layout in your theme directory, and run ?flush. The template should look a bit better now.


