UncleCheese
12th March 2015
In this lesson, we'll create the Property object that will drive most of the content in our application, and add a management interface for it in the CMS using ModelAdmin.
Requirements
This lesson uses a few assets that you'll need to download. Download them now
What we'll cover:
- What is ModelAdmin, and when do I use it?
- An overview of the CMS taxonomies
- Building a standalone DataObject
- Creating a ModelAdmin interface
- Basic customisations for ModelAdmin
- Adding our data to the template
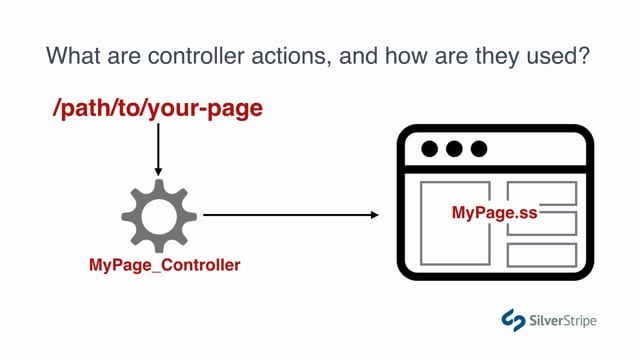
What is ModelAdmin, and when do I use it?
In the last several lessons, we've talked a lot about DataObject content versus Page content. To recap, when content represents an entire page, which is to say, the $Layout section of our template, we subclass Page and manage this content in the site tree. When content is just part of a page, but merits its own editing interface, we use DataObjects. We looked at DataObject based content in our RegionsPage. While each Region object is part of a page, it needs its own editing tool. It wouldn't make sense to manage all that structured and repeating content on one page.
That all works great when DataObject content is hosted on a page, but what about generic content that is used all over the site, and doesn't belong to any specific parent? You might have a store that manages products, or a microlending site with many projects. This type of content really merits a dedicated management console in the CMS. Binding it to a page would be both confusing for the content author, and add unnecessary complexity to your data model. Another example is content that you want to manage in the CMS that is never displayed to the public. Think of a business that manages a vast list of customers and orders. This type of content is only visible to admins, and binding it to a page doesn't make any sense.
What we're talking about here is the idea of standalone DataObjects. They're free-floating in our system -- managed, but not bound to any specific hierarchy. For this type of content, we use ModelAdmin.
When we create a ModelAdmin interface, we get a new top-level section of the CMS, living among Pages, Files, Security, etc., that is dedicated to managing content per our specification. The great thing about ModelAdmin is that you can get up and running really fast, and customisations come fairly cheap.
An overview of CMS taxonomies
Before we start writing code, let's take a step back a bit and look at the bigger picture of how the CMS is architected and how it relates to ModelAdmin.
LeftAndMain
Every top-level "page" you use in the CMS -- that is, Pages, Files, Security, Reports, and Settings -- is a subclass of LeftAndMain. LeftAndMain is kind of the matriarch of the entire CMS. It oversees and handles everything from permissions, to generating edit forms, to CSS and JavaScript bootstrapping, to request negotiation, to saving and deleting records. All of that said, the primary job of this behemoth is to provide a secure user interface that contains a Left section, like the site tree, or a search form, and a Main section, which is often an edit form. I know you're probably wondering, based on that, how did they come up with the name LeftAndMain? If you think of it, please let me know as soon as you figure it out. It's had me puzzled for years.
On a side note, I've always been quite intrigued by the name, because having a controller that describes the layout is so antithetical to MVC. In newer versions of SilverStripe, this ideological struggle must have had an effect, because, in the codebase, the Left part of LeftAndMain is now called Tools, which is much more appropriate. Perhaps someday, LeftAndMain will be dethroned by its successor ToolsAndMain, but for now, we'll enjoy the not-so-aptly named juggernaut of the CMS and take advantage of everything it offers to us.
Any subclass of LeftAndMain will automatically get added to the main menu in the CMS. All you have to do is provide templates that define its Main section, and another that defines its Tools section. ModelAdmin is an example of a class that does that, and it makes a lot of assumptions about what we want in both sections, so it's supremely easy to get started.
Building a standalone DataObject
As I said before, in this tutorial we're going to tackle the main content type in our application -- the property object, which represents any given holiday rental that an end user can rent, or that any property owner can let out. The property object will undoubtedly continue to grow with our application, but for now, we're just focused on giving them a home in the CMS, so let's keep it simple for now. Let's just give this object all the fields it needs for its representation on the home page.
Looking at the home page, we can see that we need the following fields:
- Price per night
- Photo
- Title
- Region
- Number of bedrooms
- Number of bathrooms
Further, we know that these properties displaying on the home page must have some special attribute assigned to them, so let's add a FeaturedOnHomepage field as well.
mysite/code/Property.php
class Property extends DataObject {

    private static $db = array (
        'Title' => 'Varchar',
        'PricePerNight' => 'Currency',
        'Bedrooms' => 'Int',
        'Bathrooms' => 'Int',
        'FeaturedOnHomepage' => 'Boolean'
    );

    private static $has_one = array (
        'Region' => 'Region',
        'PrimaryPhoto' => 'Image'
    );

    public function getCMSfields() {
        $fields = FieldList::create(TabSet::create('Root'));
        $fields->addFieldsToTab('Root.Main', array(
            TextField::create('Title'),
            CurrencyField::create('PricePerNight','Price (per night)'),
            DropdownField::create('Bedrooms')
                ->setSource(ArrayLib::valuekey(range(1,10))),
            DropdownField::create('Bathrooms')
                ->setSource(ArrayLib::valuekey(range(1,10))),
            DropdownField::create('RegionID','Region')
                ->setSource(Region::get()->map('ID','Title')),
            CheckboxField::create('FeaturedOnHomepage','Feature on homepage')
        ));
        $fields->addFieldToTab('Root.Photos', $upload = UploadField::create(
            'PrimaryPhoto',
            'Primary photo'
        ));

        $upload->getValidator()->setAllowedExtensions(array(
            'png','jpeg','jpg','gif'
        ));
        $upload->setFolderName('property-photos');

        return $fields;
    }
}
Most of this is straightforward, but let's look at a few peculiarities that might be jumping out at you.
Currencyfield type: We have aCurrencyfield type in our$dbarray, and aCurrencyFieldin our field list. They work nicely with each other to provide the correct formatting for currency, and ensure that the value is preceded by a currency symbol.RegionIDas a name for the DropdownField: Why do we have to explicitly append ID in this case? Other fields, likeUploadFieldjust accept the name of thehas_onefield, like Photo, without the requirement to name the exact database field. It's a bit confusing for sure, but keep in mind that aDropdownFielddoesn't always save to ahas_one. It could just as well be saving to a text field. Other form fields that work only with data relationships know how to resolve the name of a relationship to a database column, butDropdownFieldis multi-purpose and fairly data model agnostic, so that's all that's going on here.->setSource()on the DropdownField: Nothing too crazy here. This method tells the dropdown field what options are available in its list. You can provide the list as the third argument toDropdownField, but I find that it makes the code more readable to assign it in a chained method.ArrayLib::valuekey(): LikeCheckboxSetField,DropdownFieldtakes an array where the keys are the data that will be saved when the option is selected, and the values of the array are labels that will be displayed for each option. Often times, they're the same. TheArrayLib::valuekey()function just mirrors the keys and values of an array.range(1,10): This is a simple PHP function that creates an array containing a range of elements. It doesn't have to be numeric.range('A', 'C')will give you an array containing['A','B','C'], for instance.->setEmptyString(): This is the default, dataless option in our list. We don't want the dropdown to default to the first region listed, because that would be arbitrary. Rather, we want the user to explicitly declare the region the property is in. For bedrooms and bathrooms, it's fine if those default to1.
Alright, now that we have all that sorted, let's run dev/build.
Creating a ModelAdmin interface
We'll now create the ModelAdmin interface that will give us a place to hang all these Property records. A basic ModelAdmin interface is exceedingly simple to create.
mysite/code/PropertyAdmin.php
class PropertyAdmin extends ModelAdmin {

    private static $menu_title = 'Properties';

    private static $url_segment = 'properties';

    private static $managed_models = array (
        'Property'
    );
}
That's it! Let's walk through it:
$menu_title: The title that will appear in the left-hand menu of the CMS.$url_segment: The URL part that will followadmin/to access this section. In this case, the path to our ModelAdmin interface will beadmin/properties.$managed_models: An array of class names that will be managed. Each ModelAdmin can manage multiple models. Each one is placed on its own tab across the top of the screen. In this case, we just have one, but we'll be adding more down the track.
We created a new class, so we need to run a ?flush. Let's do that and go into the CMS to see what we got. You should see a new Properties tab on the left. Give it a try, and see if you can add a few new Property records.
Making customisations
Now that we've got our simple editing UI, we can start to customise it a bit to make it more powerful and user-friendly for our content editors.
Adding $summary_fields
We'll start with what we've seen before. $summary_fields gives us control over what fields display in list view.
mysite/code/Property.php
class Property extends DataObject {

        //...
    private static $summary_fields = array (
        'Title' => 'Title',
        'Region.Title' => 'Region',
        'PricePerNight.Nice' => 'Price',
        'FeaturedOnHomepage.Nice' => 'Featured?'
    );
    //...
}
Notice that we can use dot-seprated syntax to invoke methods on each field. We know that Region is a has_one, so getting the RegionID is useless. We'll instead get the region's title, which is much more friendly. Region.Title translates to $this->Region()->Title.
We also want to take advantage of the Currency field type that we used. Remember that it, too, returns an object. Most of the time, it just renders itself as a string, but we can invoke methods on it. In this, case the Nice method offered by the Currency class will give us a nicely formatted price with a currency symbol, commas, and decimal values.
Boolean field types are quite generous, as well. We can invoke the Nice() method to return a value of Yes or No, translated per the user's locale.
Providing a custom icon
Right now, the tab for our Properties section of the CMS is using a pretty generic icon, and if we have several of these custom admins, they won't be easily distinguished. Let's give it our own icon.
Download assets for this lesson if you haven't yet, and place the property.png file in mysite/icons. Why not our theme? The CMS not theme-aware, so we should avoid mixing the two. If you ever change your theme, that should have no effect on the icons that appear in the CMS. Anything that relates to your code should be kept in your project directory.
class PropertyAdmin extends ModelAdmin {

    private static $menu_title = 'Properties';

    private static $url_segment = 'properties';

    private static $managed_models = array (
        'Property'
    );

    private static $menu_icon = 'mysite/icons/property.png';
}
We changed a static property, so we'll run ?flush and see that we have a new icon.
Customising the search form
Just like the fields displayed in list view, the fields that appear in the search form are also customisable in the class definition of the DataObject. All we have to do is define a new private static variable called $searchable_fields. By default, the DataObject will provide the same fields that are specified in $summary_fields, but that may not be what you're looking for. In this case, we have PricePerNight in our $summary_fields, but that's not necessarily a field we want to search on in the admin, so let's explicitly declare a $searchable_fields array to list what we want.
class Property extends DataObject {

        //...
    private static $searchable_fields = array (
        'Title',
        'Region.Title',
        'FeaturedOnHomepage'
    );
        //...
}
Run a ?flush and see that we have a new search form that lets us search by the title of the property, and the title of its associated region.
Searching by region title is nice, but it doesn't make a whole lot of sense for this to be a free text field, since our regions are a known list. It really should be a dropdown that allows us to choose from all the regions that have been added to the database. That way, the user doesn't have to worry about making a spelling error, and has a better idea of what's in the system.
In order to do that, we'll have to write some executable code, which can't placed in a static variable assignment, so let's change private static $searchable_fields to public function searchableFields(), and we'll return an array.
class Property extends DataObject {

        //...
    public function searchableFields() {
        return array (
            'Title' => array (
                'filter' => 'PartialMatchFilter',
                'title' => 'Title',
                'field' => 'TextField'
            ),
            'RegionID' => array (
                'filter' => 'ExactMatchFilter',
                'title' => 'Region',
                'field' => DropdownField::create('RegionID')
                    ->setSource(
                        Region::get()->map('ID','Title')
                    )
                    ->setEmptyString('-- Any region --')
            ),
            'FeaturedOnHomepage' => array (
                'filter' => 'ExactMatchFilter',
                'title' => 'Only featured'
            )
        );
    }
        //...
}
When we define searchableFields(), we need to be much more explicit about how we want our search form configured. Each field we include has to be mapped to an array containing three keys:
filter: The type of filter that should be used in the search. For a full list of available filters, seeframework/search/filters, or view the API documentation. For title, we want a fuzzy match, so we usePartialMatchFilter, and since regions are filtered by ID, we want that to be anExactMatchFilter.title: The label that will identify the search fieldfield: You have three options here.- You can provide a string, representing the
FormFieldclass you want, as we did withTitle. - If you want something more complex, however, you can use a
FormFieldobject. In this case, I've instantiated aDropdownFieldmuch like the one we used in ourgetCMSFieldsfunction. - Another option is to just leave this undefined, and the DataObject will ask the fieldtype for its default search field, as we did with our
FeaturedOnHomepagefield. Every field type knows how to render its own search field. In this case,Booleangives us a nice dropdown of three options: Yes, No, or Any, which is perfect. ACheckboxFieldwould be either on or off. It wouldn't allow us to opt out of that filter.
- You can provide a string, representing the
Give the search form a try now. It feels a little better, right?
Importing data
At this point, it's probably a good idea to find the import.sql file that came with the lesson assets and run that on your database. It contains a lot of sample properties that will fill out your database and give you some data to work with. If you're using MAMP, you can access phpMyAdmin and run the import there. If you're not clear on how to do that, you can find many tutorials to help you. If you're not using phpMyAdmin, you can follow the instructions in the How to use this guide article in this section.
This step is optional, but it's a good idea. It will help keep us on the same page, and it will save you the time of creating dummy records.
Adding properties to the template
The last step is simple. Let's just write a method in our HomePage controller that gets the featured properties.
mysite/code/HomePage.php
class HomePage_Controller extends Page_Controller {

        //...
    public function FeaturedProperties() {
        return Property::get()
                ->filter(array(
                    'FeaturedOnHomepage' => true
                ))
                ->limit(6);
    }
}
Now let's render the output to the template.
themes/one-ring/templates/Layout/HomePage.ss (line 118)
<% loop $FeaturedProperties %>
<div class="item col-md-4">
    <div class="image">
        <a href="$Link">
            <h3>$Title</h3>
            <span class="location">$Region.Title</span>
        </a>
        $PrimaryPhoto.CroppedImage(220,194)
    </div>
    <div class="price">
        <span>$PricePerNight.Nice</span><p>per night<p>
    </div>
    <ul class="amenities">
        <li><i class="icon-bedrooms"></i> $Bedrooms</li>
        <li><i class="icon-bathrooms"></i> $Bathrooms</li>
    </ul>
</div>
<% end_loop %>
You may have noticed that we deliberately added a non-existent method, $Link to the property. That's okay. It will just get ignored for now, but in the future, we'll add that method, and we won't have to come back here to make the update.
Reload the page and see your featured properties!