Up and Running: Setting up a local SilverStripe dev environment
In this lesson: _ss_environment, installation, composer
Silverstripe CMS version: 4.x (stable)
In this introductory lesson, we cover installing a local webserver (e.g. MAMP), installing and using Composer, and configuring an .env file. Having a finely tuned local environment for your projects will help you work faster and with less redundancy.
 UncleCheese
Installing a local web server
SilverStripe is a PHP-based application that connects to a database, so in order to run it, you'll need a webserver. You won't want to be doing all of your development on a remote environment, so setting up a local webserver is highly recommended. If you're running OSX or Linux, you probably have all the tools you need already installed on your system, but that's not always ideal. Installing your own local web server affords you more granular control over your environment and insulates it from system-level upgrades.
While the step-by-step details of creating a local web server are out of scope for this tutorial, there are several choices to be aware of:
Virtualisation
Installing a virtual web server, on your local machine is fast, fairly easy, and eliminates many of the variables and unknowns that are often hazardous to local development. There are two main players in this space:
- Vagrant, which runs on top of VirtualBox, providing you a simple configuration layer and tools for running your virtual machine. There are many pre-cooked environments ready for you to download and consume, such as Scotch Box
- Docker, which creates a "container" for your virtual environment, sharing the same operating system as the the host (your computer).
In general, Vagrant is much easier to set up, but is much more resource intensive as each instance uses its own operating system, while Docker is more difficult to learn and set up, but uses far less resources and runs more efficiently than Vagrant.
Create your own
There are a number of tutorials available for assembling your own recipe of Apache, PHP, and MySQL using package managers like Homebrew or Macports.
- macOS 10.12 Sierra Apache Setup
- A Github Gist of setting up a LAMP stack on OSX
Turnkey solutions
While less flexible than building an environment from scratch or using a virtual machine, there are some single-click installs that will put a basic server on your workstation. Some of these include:
What these products offer in ease of use and simplicity they revoke in the form of flexibility. They are often pretty rigid and cannot be extended without a lot of work and/or hacking. SilverStripe requires the php-intl extension, for instance, which is not included in any of these products.
Introducing Composer
Before we get into installing Composer, we should probably go over what exactly Composer is and how it works.
What is Composer, and why do I need it?
Composer is a dependency manager for PHP. Dependency managers are increasingly popular these days, especially for front-end libraries; You may have heard of NPM. At their most fundamental level, dependency managers are simply abstractions of a source code repository. They obscure all the minute details about where the projects live and what branches are available, and they allow you to simply refer to packages semantically by name and by version number.
A key feature of Composer is that it resolves dependencies. When one module requires one or more other modules in order to work properly, Composer will sort all that out and pull down everything you need. Further, Composer applies version constraints. So if a package requires a module that doesn't work with something you already have installed, it will apprise you of that conflict and halt the installation so that your project doesn't break.
You might be wondering, "Why can't I just go and download the modules and install them manually?" Well, let's use an example SilverStripe project without Composer to illustrate why that isn't always a good choice.
Let's say you want to get a gallery module for your website. You go out to some web page, download it, and drop it into your project. When you try to run the application, the module complains that it's missing the slideshow module, which is integral to the gallery module.

Now your project is hosed until you satisfy this dependency. So you go and find the slideshow module, and after some digging you're able to track it down. You drop it in, hoping this will make your gallery module happy.
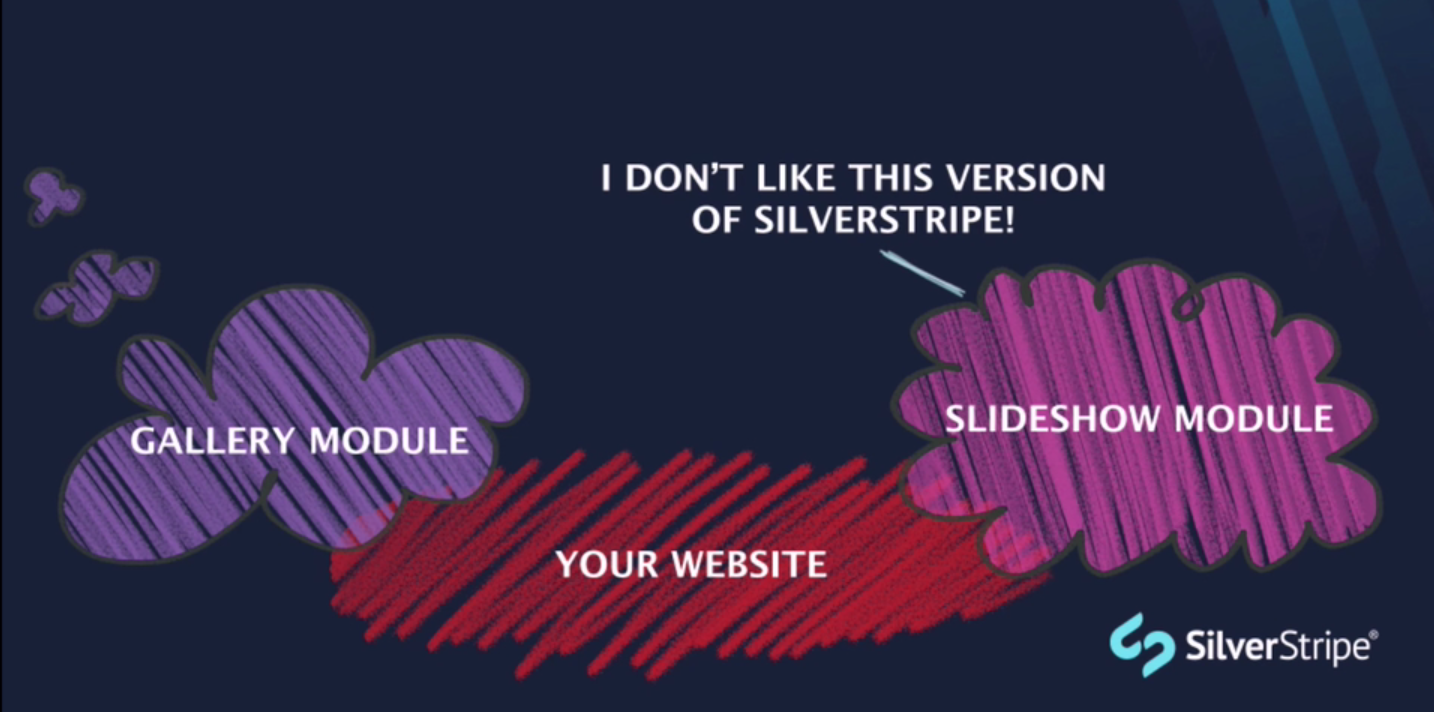
Now we have a new problem. The slideshow module is incompatible with the version of SilverStripe that we're running. You can see where this is going. All the players in your project don't get along, and your website blows up.
Installing packages with Composer solves all these issues because you simply execute a nice, declarative command, asking to install a package and a specific version, and it handles all the orchestration for you.
composer require example/some-moduleThis is by no means a magic bullet. You will still have to resolve conflicts, but it will tell you what those conflicts are, and it won't let your project exist in a state with incompatibilities.
Installing Composer
Installing Composer is just a matter of running two commands:
$ curl -s https://getcomposer.org/installer | php
$ sudo mv composer.phar /usr/local/bin/composer
These commands might look a little foreign to you if you're new to the terminal. If you need more information, SilverStripe documentation about Composer.
Let's run the first command, which installs Composer. It doesn't matter where in the file system we run this command.
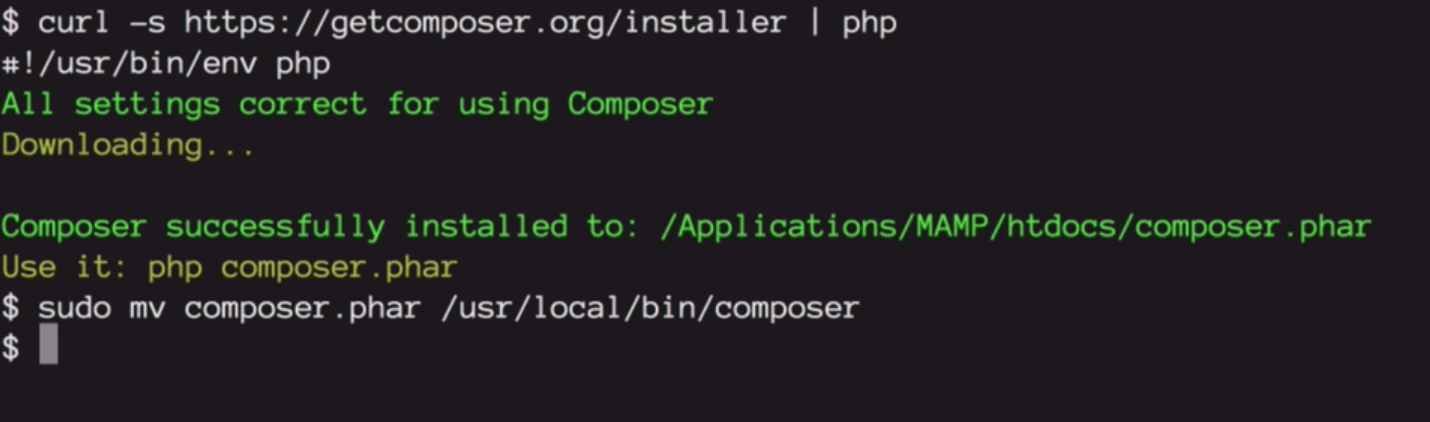
The second command will move the Composer executable to a place where it's globally accessible, so we can just run Composer anywhere.
Creating a SilverStripe project
Let's create a SilverStripe project using Composer. Because this is a new project, we'll use the create-project command and point Composer at the silverstripe/installer. We'll specify a project name of example.
$ composer create-project silverstripe/installer exampleComposer will now go out and read the SilverStripe installer package. Then, it's going to pull down all the dependencies, including SilverStripe Framework, and several other core modules, along with various supporting PHP libraries. Lastly, it's going to install the default theme that comes with the SilverStripe installer.
The public/ folder
SilverStripe only exposes a very small slice of your entire project to the web. All of the PHP code, configuration files, templates, and other core files are stored in the project root, which is not web accessible. The actual index.php file that renders your website lives in the public/ folder, along with any and all other frontend depedencies such as CSS, JavaScript, webfonts, and images.
This means that if your localhost resolves to a generic, catch-all directory, you'll have to supply public/ at the end of the URL in order to load the correct context.
In our case, our site lives at http://{your localhost}/example/public.
Will public/ always be in my URL?
No! It just takes a bit of setup.
It's a good idea to set up a virtual host for your project, so that your local project emulates how it will actually be accessed on the web. For instance, for our project, a virtual host like http:://example.local could point to the example/public folder. In an Apache installation, that is configured like this:
<VirtualHost 127.0.0.1>
DocumentRoot /path/to/my/websites/example/public
ServerName example.local
</VirtualHost>
Setting up virtual hosts will look different for every web server, but it is almost always a simple and painless process backed by good documentation.
Viewing your website
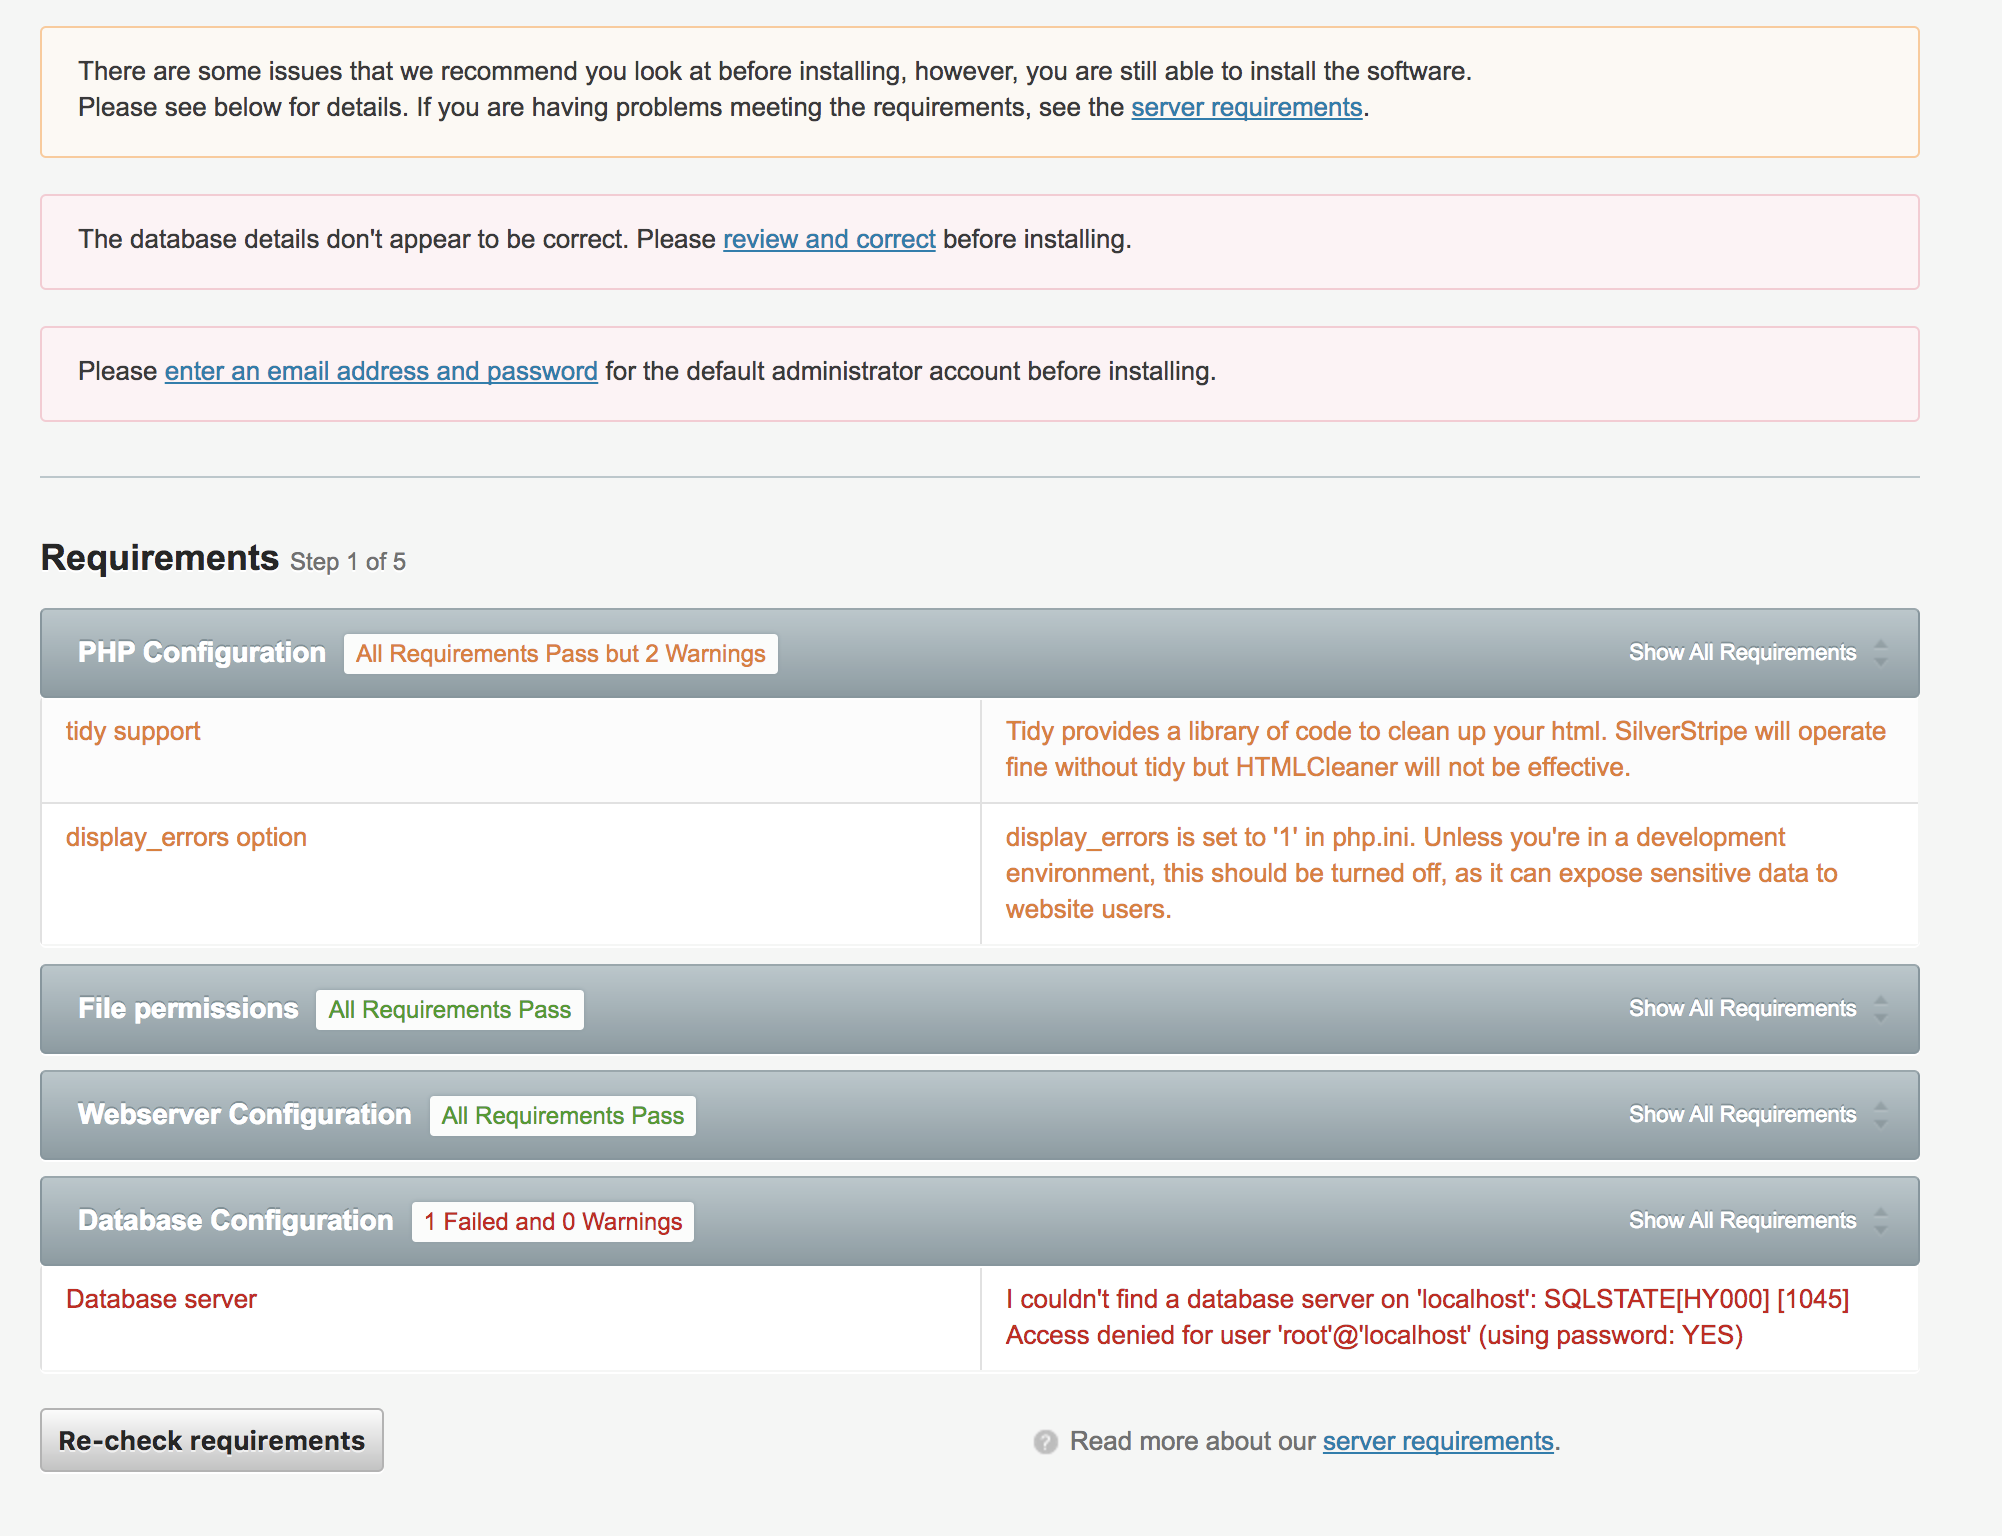
Assuming you're not using a virtual host, go to the URL http://{your localhost}/example/public. You should see an install page. It's full of red errors that are telling us that the install isn't going to work, so let's go through this and see if we can sort it out.
Configuring the installer
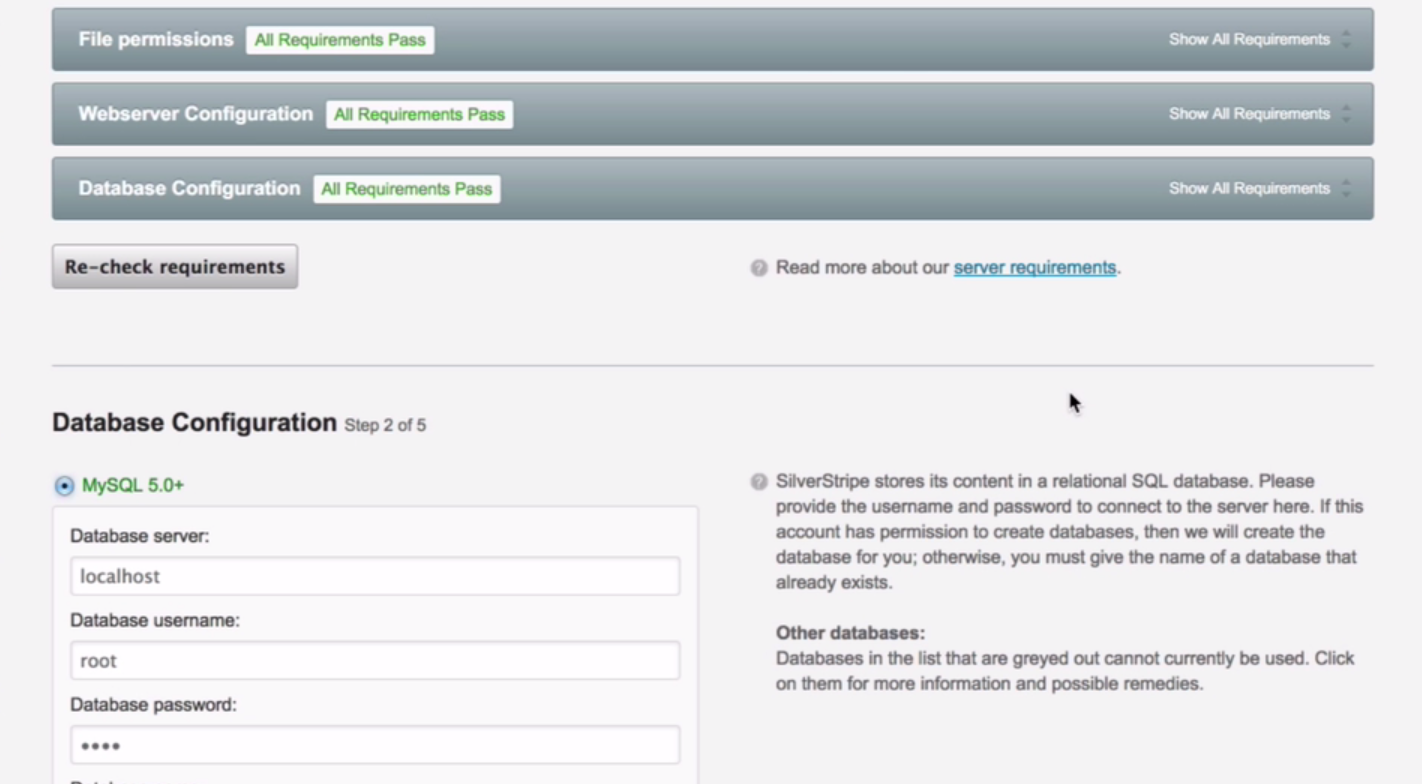
One thing that it's complaining about is that there isn't enough information to connect to the database. So let's fill out the database username and password. In many local MySQL installations, the root password is often empty. If that's the case, you probably won't see this error, as no password is the correct password!
Let's just change the database name to something a little bit more meaningful. We'll call it SS_example, because this is the project example.
Lastly, we can create an admin account. Let's specify a password. That'll be the account we use to connect to the CMS. We'll recheck the requirements and install SilverStripe.
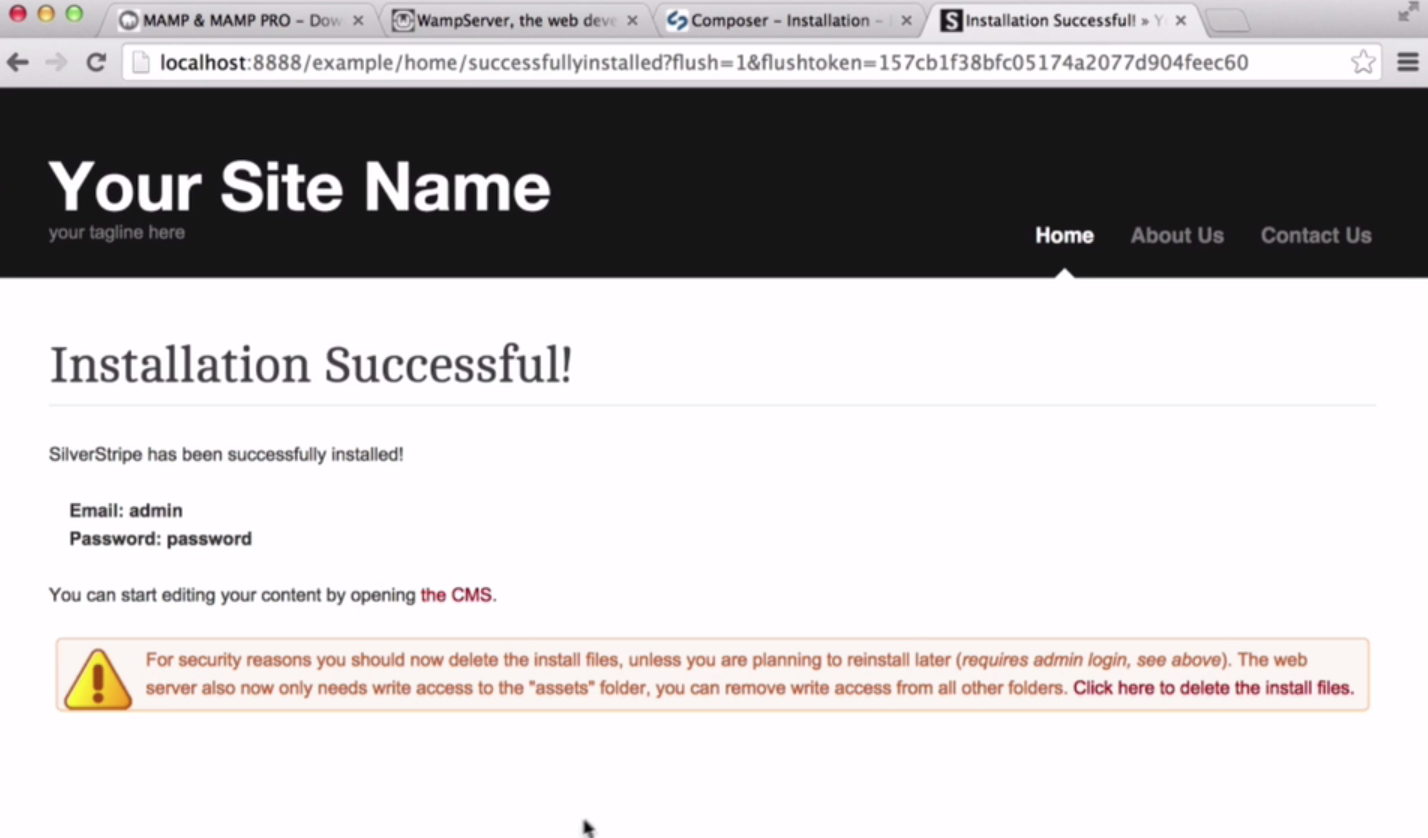
Now that the installation is complete, SilverStripe is going to prompt you to delete the install files, as they are a security risk. Click on that, and it will authenticate you before moving forward. Provide that admin password you chose earlier.
Refining your development environment
Now that we've installed SilverStripe, let's finely tune our development environment so we can get things working a little bit faster.
.env
The main ingredient in environment management in SilverStripe is the .env file. This file provides a shared configuration across all your projects through the injection of environment variables. It should contain information such as database credentials, as those are most likely to be shared across all of your local development projects.
It can also include other application settings. You might have API keys or email addresses in there that you want to specify as globally accessible by all projects.
The key attribute of the .env file, however, is that it should not ship with the project. It can live outside the web root, outside of source control. When you deploy this project from your local environment to somewhere else, that remote environment should have its own configuration, so having the file outside the project (or at least ignored by your source control system) means you don't have to worry about accidentally overriding settings.
How .env works
Let's take a look at an example directory structure, where we have an htdocs folder, and three example projects underneath it.
- htdocs/ [ .env ]*
- project-a/
- project-b/
- project-c/
With the .env file in htdocs, the settings will cascade down to project A, B, and C.
You can place an .env file in, say project B's project root 'project-b', and it will override the parent .env file.
- htdocs/ [ .env ]
- project-a/
- project-b/ [ .env ]*
- project-c/
Some common configurations
In a typical .env file, you definitely want to define the database server, database username and database password. Everything is defined in constants.
your-web-root/.env
SS_DATABASE_SERVER='localhost'
SS_DATABASE_USERNAME='root'
SS_DATABASE_PASSWORD='root'
Lastly, you'll probably want to define the environment type as dev, so you can take advantage of all the debugging tools and get some verbose errors.
your-web-root/.env
SS_DATABASE_SERVER='localhost'
SS_DATABASE_USERNAME='root'
SS_DATABASE_PASSWORD='root'
SS_ENVIRONMENT_TYPE='dev'
Let's create a second SilverStripe project. We'll call it example2.
$ composer create-project silverstripe/installer example2So let's go to that example2 URL (http://{your localhost}/example2/public). The install page comes up again, but it looks slightly different.
Some of the fields have been populated for you, such as the database username and password, but you still have to provide a database name. Let's use SS_example2. Also, provide that admin password again.
Click "Install SilverStripe," and once again, clear out those install files.
Going further
Let's now take this a step further. There are some more things we want to throw into our .env file. We can use SS_DATABASE_CHOOSE_NAME to tell SilverStripe to intelligently determine a database name so that you don't have to. It will look at the filesystem, see where the project is installed, and choose a database name based on that. By default this takes the form of e.g. SS_project-a, keeping with the examples above.
Also, you can specify the default admin username and password. For local development you're probably not too concerned about security, so having something easy to remember such as root/root, is just fine.
your-web-root/.env
SS_DATABASE_SERVER='localhost'
SS_DATABASE_USERNAME='root'
SS_DATABASE_PASSWORD='root'
SS_ENVIRONMENT_TYPE='dev'
SS_DATABASE_CHOOSE_NAME=true
SS_DEFAULT_ADMIN_USERNAME='root'
SS_DEFAULT_ADMIN_PASSWORD='root'
Another setting you might want to turn on is SS_SEND_ALL_EMAILS_TO. If you provide your email address here it will force all emails to go to you, instead of to the places that your application might be sending them, which could include a client or anyone else who you don't want getting your tests. By applying this setting, it will force email to go to you, no matter what to address you've specified, so that's very useful in development mode.
For a full list of settings you can go to the docs and just look up environment management There are probably a dozen or so other settings you can throw in here. Some are more useful than others. Have a quick look through there because you might find something that's really useful to you.
Let's save the changes to .env, and apply those new settings.
When we go to the http://{your localhost}/example3/public URL, you'll notice that we bypass the install page. That's because SilverStripe has learnt everything it needed to know about running this project from .env.
This is a really quick way to light up a project and do some testing. You can just throw this project away when you're done and do it again, and you don't have to go through that install process every single time. .env comes in really useful here, as it applies all the settings you want for every single project.
We're now off and running with a local development environment for SilverStripe development.
Get started building your first SilverStripe website with our series of lessons.