Working with data relationships - $has_many
In this lesson: getCMSFields, has_one, DataObject, GridField, GridFieldConfig, has_many, summary_fields
Silverstripe CMS version: 4.x (stable)
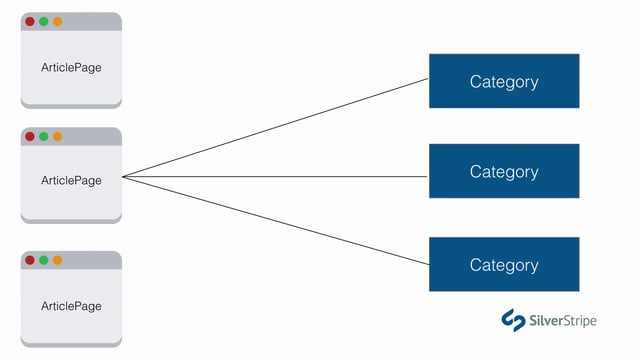
In this lesson, we're going to dig a bit deeper into relational data by introducing some plural relationships with $has_many.
 UncleCheese
So far, we've only been dealing with content that is directly associated with a page, but often times, pages are made up of content that is stored outside the page, and merely brought into the page through a data relationship. We saw a bit of this in Lesson #7 when we created $has_one relationships to File objects. All of the information about the file is stored on its own table, and the page merely references it. We're going to dig a bit deeper into relational data in this lesson by introducing some plural relationships with $has_many.
What we'll cover
- Creating a generic DataObject
- Setting up a
$has_manyrelationship - Introduction to the GridField
- Working with relational data on the template
Creating a generic DataObject
Attached to this lesson is a download link to a new static template we'll be working with, regions-page.html. Our designer has once again stripped away all the chrome and left us with just the $Layout section, so before we go any further, let's download that file and migrate the page into a SilverStripe template.
Copy the contents of regions-page.html into a new file, app/templates/SilverStripe/Lessons/Layout/RegionsPage.ss.
Then, create a new page type to go with it.
app/src/RegionsPage.php
namespace SilverStripe\Lessons;

use Page;

class RegionsPage extends Page
{

}
app/src/RegionsPageController.php
namespace SilverStripe\Lessons;

use PageController;

class RegionsPageController extends PageController
{

}
Run a dev/build?flush, and go into the CMS. Change the Regions page to type RegionsPage (on the Settings tab). Now go back to your website and click on "Regions." You should see the new layout.
All of this is static content, of course, and we need to start carving it up into something editable in the CMS. One of the most apparent features of this content is that it clearly belongs in a loop. We see the regions Northeast, Southeast, etc., all with the same structure and data. Each contains a title, a photo, and a short description.
We could hand this off to the rich text editor and create all this content in the $Content block, but that would be pretty ugly. Our content editor would have to take care to create very specific markup, and that would push the boundaries of WYSIWYG utility. We need to make each of these regions editable pieces of structured data.
Let's first create the Region data type. Just like we discussed in the previous lesson, generic, non-page content types should subclass SilverStripe\ORM\DataObject.
app/src/Region.php
namespace SilverStripe\Lessons;
use SilverStripe\ORM\DataObject;
use SilverStripe\Assets\Image;
use SilverStripe\Forms\FieldList;
use SilverStripe\Forms\TextField;
use SilverStripe\Forms\TextareaField;
use SilverStripe\AssetAdmin\Forms\UploadField;
class Region extends DataObject
{
private static $db = [
'Title' => 'Varchar',
'Description' => 'Text',
];
private static $has_one = [
'Photo' => Image::class,
];
private static $owns = [
'Photo',
];
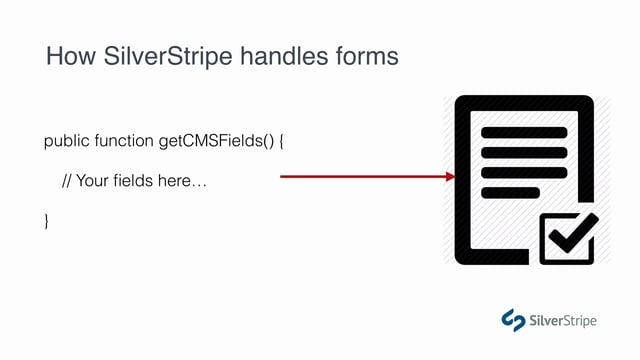
public function getCMSFields()
{
$fields = FieldList::create(
TextField::create('Title'),
TextareaField::create('Description'),
$uploader = UploadField::create('Photo')
);
$uploader->setFolderName('region-photos');
$uploader->getValidator()->setAllowedExtensions(['png','gif','jpeg','jpg']);
return $fields;
}
}As described in a previous tutorial, the $owns array is used to ensure that when regions are saved, their related images are pubilshed as well. Files and images are, by default, draft until explicitly published. This ensures they'll be implicitly published with the page that uses them.
You might have noticed that our getCMSFields() function looks a bit different. That's because we're not going to be using the typical page editing interface for this object, so we're not going to have the tabs that come with Page objects. We could very easily create one, but since this data type is so simple, we'll just leave it as a simple field list, and add all the form fields to the constructor.
Setting up a $has_many relationship
Now that we have our standalone Region object, we need to relate it to our RegionsPage. We know from our design that the page can contain any number of Regions, so for this, we'll use the $has_many relationship.
app/src/RegionsPage.php
// ...
class RegionsPage extends Page
{
    private static $has_many = [
        'Regions' => Region::class,
    ];
}
This follows the same convention as the $has_one we used in a previous lesson. The key, "Regions" is the arbitrary name we'll give to the relationship. It's the method we'll use to get a list of all the related regions. The value is the name of the related class.
Run a dev/build and see if you get any database changes. If you don't see any, that is the expected result! Why? Well, we're not quite done yet.
Reciprocating the $has_many
$has_many relationships are a bit of a special case because they have to be reciprocated by the related class. While every RegionsPage has many Regions, it is also true that every Region has one RegionPage that contains it. Regions cannot belong to any more than one region page.
This is important, because the database mutation happens at the $has_one level, not the $has_many. What will really bind these two objects together is a Region object providing one, and only one, RegionsPageID. Let's make that update now.
app/src/Region.php
//...
class Region extends DataObject
{

    //...
    private static $has_one = [
        'Photo' => Image::class,
        'RegionsPage' => RegionsPage::class,
    ];

    //...
Typically, reciprocal has_one's like this can just be named after the parent class.
Now let's run a dev/build and see that we get a new RegionsPageID field.
Introduction to GridField
We've got our $has_many relationship defined, with a $has_one on the other side, and we're ready to start populating the relationship with data. For this, we'll need one of the workhorses of the CMS interface -- GridField.
GridField is a highly configurable form field that allows you to manage an arbitrary table of data. In its most primitive sense, you can think of it as an abstraction of a database table, but there's much more that you can do with it. To manage our Region objects, we'll want a tab on the RegionsPage that allows us to create, read, edit, and delete associated Region records.
Let's make the following update to our RegionsPage object.
//...
use SilverStripe\Forms\GridField\GridField;
use SilverStripe\Forms\GridField\GridFieldConfig_RecordEditor;

class RegionsPage extends Page {

    private static $has_many = [
        'Regions' => Region::class,
    ];

    public function getCMSFields()
    {
        $fields = parent::getCMSFields();
        $fields->addFieldToTab('Root.Regions', GridField::create(
            'Regions',
            'Regions on this page',
            $this->Regions(),
            GridFieldConfig_RecordEditor::create()
        ));

        return $fields;
    }
}
The GridField constructor
Let's take a look at the argument signature for GridField:
- 'Regions': A required, arbitrary name for the GridField. You'll need this if you ever want to make updates to your GridField after it's been added to the FieldList.
- 'Regions on this page': A title for the GridField. Should be user-friendly.
- $this->Regions(): This is the most substantial component of your GridField. It populates the grid with data. In this case, we're using the magic method created by our
$has_manyrelationship to fill the grid with all the records that are currently associated with the page. - GridFieldConfig_RecordEditor::create(): This is a bit more complex. It creates a object that contains a number of
GridFieldComponentobjects, which provide various UI tools to the grid, such as pagination, an "add new" button, delete/edit buttons, etc. TheseGridFieldConfigobjects can be configured with any variety of components you like, but SilverStripe ships with a few common configurations that are often used.GridFieldConfig_RecordEditoris a great one, because it provides all the basic UI you'd expect to have for managing data.
Adding versioning
Right now, any changes we make to regions will go to the live site immediately, since they have no published/draft state. Let's start by adding versioning to those records.
app/src/Region.php
//...
use SilverStripe\Versioned\Versioned;
class Region extends DataObject
{
//...
private static $extensions = [
Versioned::class,
];
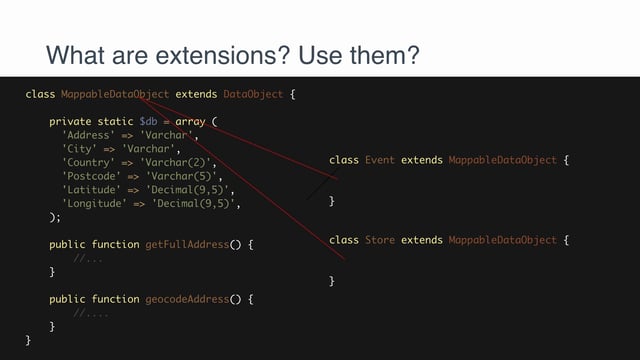
//... First, we apply the DataExtension Versioned. We'll talk more about extensions in a future tutorial, but for now, just understand that this extension mixes functionality into the class to make it support versioning.
Run a dev/build?flush and we should see some new tables created.
Lastly, we need to declare ownership between RegionsPage and Region so that changes to publication cascades from parent to child, and vice-versa.
app/src/RegionsPage.php
//...
class RegionsPage extends Page
{
    //...
    private static $owns = [
        'Regions'
    ];
    //...
Notice that we don't need to use the fully-qualified class name, Region::class, in the $owns declaration. That's because we're referring to the relationship, not the class. The relationship is declared as Regions in the has_many array. The entries in $owns could just as easily be method names, if you wanted to declare ownership in a custom getter.
Let's go back into the CMS and edit our "Regions" page. See that we have a tab now that contains a grid. Give it a try and add some test records.
Configuring the GridField
As stated earlier, GridField is highly configurable. One of the most common customisations you'll want to make to your grid is the columns that are displayed. In this case, there are only a handful of fields, so only showing Title and Description isn't so bad, but you can imagine that if the DataObject had 10 distinct fields, we would probably want to tighten that up a bit.
In our case, let's make a minor enhancement, and just add the Photo field to our list view. By default, only fields in the $db array get included. Since Photo is in the $has_one, we have to specifically include it.
Let's define a $summary_fields variable on our Region object.
//...
class Region extends DataObject {
    //...
    private static $summary_fields = [
        'Photo' => '',
        'Title' => 'Title of region',
        'Description' => 'Short description'
    ];
    //...
}
This array maps the name of the field to the human-readable column name. We'll let the photo speak for itself and leave its column header empty.
Because we changed a private static variable, we need to run ?flush to see the update to the grid. How does it look? Pretty bad, right? The photo is not being resized to fit the grid.
Using a custom getter
Fortunately, $summary_fields accepts more than just field names. We can provide any public method on our DataObject as a column value. Let's create a method that returns a resized photo.
//...
class Region extends DataObject {
    //...
    private static $summary_fields = [
        'GridThumbnail' => '',
        'Title' => 'Title',
        'Description' => 'Description'
    ];

    public function getGridThumbnail()
    {
        if($this->Photo()->exists()) {
            return $this->Photo()->ScaleWidth(100);
        }

        return "(no image)";
    }
    // ...
}
Run ?flush again, and see that our grid looks much cleaner now.
We could have saved ourselves a lot of time by using a method that SilverStripe provides to all Image objects by default -- CMSThumbnail(). Photo.CMSThumbnail would have achieved a very similar result, without the fallback text (no image).
Traversing fields
Another great feature of $summary_fields is that you can traverse relationships to get foreign fields, using a dot-separated syntax. Suppose we wanted to show the Filename field on the Photo:
//...
class Region extends DataObject
{
    //...
    private static $summary_fields = [
        'Photo.Filename' => 'Photo file name',
        'Title' => 'Title',
        'Description' => 'Description'
    ];
    //...
}
This type of syntax becomes especially useful when formatting dates, or getting the title of a related $has_one rather than just showing its numeric ID.
Adding versioning to GridField
At the moment, GridField isn't offering us anything in the way of publication. All we have are "Save" and "Delete" buttons. To get the full array of publishing actions ("Save", "Publish", "Archive", etc.), we'll need to explicitly state the Region object should use versioned GridField extensions. To enable that, set versioned_gridfield_extensions to true.
//...
class Region extends DataObject
{
    //...
    private static $versioned_gridfield_extensions = true;
    //...
}
Working with relational data on the template
Now that our relational data is all in place, it's time to display it on the template. This should be pretty straight forward. Let's start with RegionsPage.ss
app/templates/Layout/RegionsPage.ss, line 9
<div class="grid-style1 clearfix">
    <% loop $Regions %>
    <div class="item col-md-12"><!-- Set width to 4 columns for grid view mode only -->
        <div class="image image-large">
            <a href="#">
                <span class="btn btn-default"><i class="fa fa-file-o"></i> Read More</span>
            </a>
            $Photo.Fit(720,255)
        </div>
        <div class="info-blog">
            <h3>
                <a href="#">$Title</a>
            </h3>
            <p>$Description</p>
        </div>
    </div>
    <% end_loop %>
</div>
Notice that we're skipping over the links. We'll address that in a future lesson.