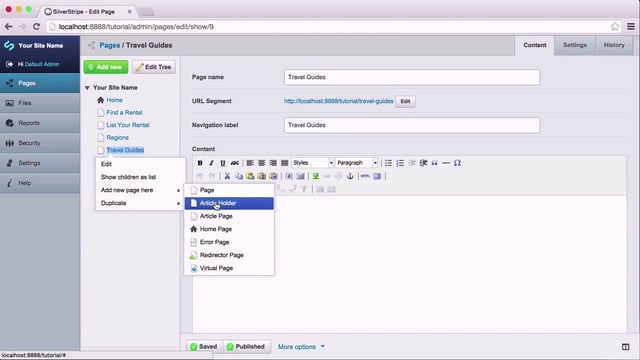
Creating a new page type
Let's create our second template, based on the home.html provided in the __assets/ directory in for this lesson. In order to create a new page type, we first need to add a PHP class to represent it. Having a new class will give us the option of creating this page type in the CMS. Since this is code related, we'll leave the theme folder for now, and add the file to the project directory, app/.
Create two files in your app/src folder: HomePage.php and HomePageController.php. Add the following content:
app/src/HomePage.php
namespace SilverStripe\Lessons;

use Page;

class HomePage extends Page
{

}
app/src/HomePageController.php
namespace SilverStripe\Lessons;

use PageController;

class HomePageController extends PageController
{

}
We've chosen SilverStripe\Lessons as our namespace. Feel free to use whatever you prefer. Both classes are deliberately empty, as they are just placeholders for the time being. Notice that we subclass the Page class so that we can inherit all of its properties and functionality, such as $Title, $Content, $Menu, etc. This first class is called the model. It will contain all of the custom database fields, data relationships, and functionality that can be expressed across multiple templates.
By convention, every page type is paired with a controller that follows the naming pattern [PageType]Controller. If you do not wish to adhere to this convention, simply define a getControllerName() method in your model. The controller is the liaison between the HTTP request and the finalised template. Controllers can become very dense with functionality, and will commonly include functions for querying the database, handling form submissions, checking authentication, and dealing with anything related to the request/response cycle.
Now that we have this new page type, it is necessary to rebuild the database so that the CMS is aware of its existence. Access the URL /dev/build on your website. When the script is complete, you should see some blue text indicating that the field SiteTree.ClassName was updated to include SilverStripe\Lessons\HomePage.
Let's go into the CMS at the URL /admin, log in if necessary, and edit the page Home. On the Settings tab, change the Page type to Home Page. Save and publish.
Leave the CMS and reload the home page in your browser. You should see the default page type with the home page content.
Using the $Layout variable
As a matter of best practice, we never want to repetitively hardcode any values in our template that are subject to change. This principle is more commonly referred to as DRY (Don't Repeat Yourself). One glaring problem you may have noticed is that, as we add new page types, we'll have to copy over a lot of content (e.g. the head, navigation, and footer) to each page, but with little variation, all of our templates are going to share this content. This type of outer content is often called the "chrome" or your site. To prevent the redundancy of chrome in each template, SilverStripe offers template layouts.
To illustrate how this works, let's first find all the content that will not be common between our default page and our home page. A quick glance through the mockups reveals that everything between the closing </header> tag and the opening <footer> tag is unique content.
Highlight all of the content between </header> and <footer> and cut it into your clipboard. Replace all of that content with the variable $Layout.
Create a new template in templates/Layout called Page.ss. Paste the content from your clipboard into that file, and save.
Likewise, we'll need to create a new Layout/ template for our HomePage class. Unlike Page however, our HomePage page type is namespaced. We'll need to create the appropriate pathing in our templates/ directory for the fully-qualified name.
Make a directory called templates/SilverStripe/Lessons. In that directory, create another directory called Layout/. In that directory, create HomePage.ss. The full path should be templates/SilverStripe/Lessons/Layout/HomePage.ss.
Now copy the content between </header> and <footer> in the __assets/home.html file to your clipboard and paste it into this new file.
Any time we create a new template, we need to flush the cache, so append ?flush to the URL and reload. You should now see a distinct design for the Home page versus the other two pages.
It may seem trivial, but you've just achieved massive gains in efficiency and code organisation. Here's how it works:
- SilverStripe sees that you are requesting a URL for a page that uses the
HomePage.sstemplate - It first looks in the main
templates/directory to find the chrome for this page. If it findsHomePage.ssin there, it will select that as your chrome. If not, it will go through the ancestry of that page type until it finds a match. It finds the parent class ofSilverStripe\Lessons\HomePage, which isPage, and uses it. - The
$Layoutvariable tells SilverStripe to look in thetemplates/{page namespace}/Layoutdirectory for a template that matches this page type. It findsHomePage.ssand uses it. If it had not foundHomePage.ss, it would chase up the ancestry and findPage.ss, and use that as a fallback.
A vast majority of SilverStripe projects have only one template, Page.ss, in the root templates/, leaving everything else to {namespace}/Layout/. In some circumstances, you may have a page type that has such a distinct design that it needs its own chrome. A common example of this is a login page, where the user is presented with a very streamlined, isolated form.
Injecting assets through the controller
Right now, we have all the CSS and Javascript dependencies hardcoded in the template. This works okay, but often times you will benefit from handing over management of dependencies to the controller. This gives you the ability to require specific files for only certain pages as well as conditionally include or exclude files based on arbitrary business logic.
To include these dependencies, we'll make a call to the Requirements class in our controller. Since these dependencies are common to all pages, we can add this to PageController in PageController.php.
Make the following update to the init() method.
use SilverStripe\View\Requirements;

// ...

protected function init()
{
  parent::init();
    Requirements::css('css/bootstrap.min.css');
        Requirements::css('css/style.css');
        Requirements::javascript('javascript/common/modernizr.js');
        Requirements::javascript('javascript/common/jquery-1.11.1.min.js');
        Requirements::javascript('javascript/common/bootstrap.min.js');
        Requirements::javascript('javascript/common/bootstrap-datepicker.js');
        Requirements::javascript('javascript/common/chosen.min.js');
        Requirements::javascript('javascript/common/bootstrap-checkbox.js');
        Requirements::javascript('javascript/common/nice-scroll.js');
        Requirements::javascript('javascript/common/jquery-browser.js');
        Requirements::javascript('javascript/scripts.js');
}
We use themedCSS and themedJavascript to auto-locate the resource based on the current theme. That way, if the theme ever changes, we don't have to update the path.
The only resources we haven't included are the html5 shim that is conditionally included for IE8, and the Google font that is loaded from an absolute path.
Next, remove all the <script> and stylesheet tags from your templates/Page.ss file that are now loaded via Requirements.
Tidying up with includes
To keep our templates less dense and easier to work on, we'll spin off parts of the template into the templates/Includes directory. Start by cutting the <div id="top-bar" /> into your clipboard. Replace that entire div with <% include TopBar %>. The include declaration tells SilverStripe to look in the templates/Includes directory for a template with the name that you specified.
Create a file named TopBar.ss in templates/Includes and paste the content from your clipboard. We don't need a namespaced path in this case, since the Page.ss template is not namespaced itself.
Repeat this process for <div id="nav-section" />, and call the template MainNav.ss.
Repeat the process once again for the entire <footer /> tag, and call the template Footer.ss.
Lastly, remove all of the HTML comments from your Page.ss, as the template is now too sparse to require such guides.


